Your Cart is Empty
FREE DELIVERY AVAILABLE!
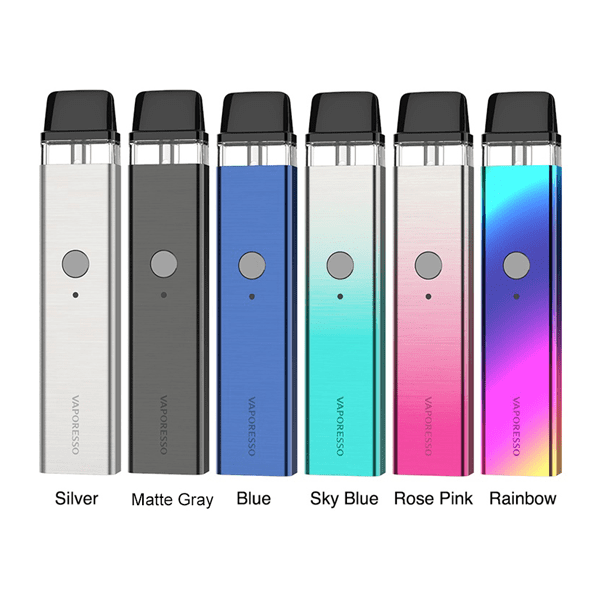
The Vaporesso Xros is one of the truly great vaping devices. Buying a simple, beginner-oriented vaping device often means you’ll have an experience that’s crippled in some way. You’ll get a device that’s sleek and easy to use, but you’ll have to compromise in some other area by accepting a device offering poor battery life or subpar vapour production. With the Vaporesso Xros, there’s no need to compromise. You’ll get a device that offers a superb vaping experience right out of the box, and you’ll have no trouble getting the best possible performance out of the device even if you’ve never vaped before.
In our Vaporesso Xros instruction manual, we’ll explain the most essential points that you need to know in order to get started with this device right away. We’ll also explain how to fix the problems that you might encounter when using the Vaporesso Xros – and if you’re still shopping for your ideal vaping device, you can grab the Vaporesso Xros right here for just £24.99. It’s a perfect pod system for new and experienced vapers alike.
When you buy any new consumer electronic device, it’s always a good idea to read the manual. We understand, though, that you don’t want to spend hours reading when you receive a new vaping device – you want to start using the device right away. Our Vaporesso Xros instruction manual will help you get started quickly, so you can vape now and read the printed manual later.
The Vaporesso Xros includes a charging cable and has a USB-C port on the bottom of the device. To charge the device, connect it to your computer using the included cable. The LED on the device turns red to indicate that the battery is charging. When the indicator turns green, the Vaporesso Xros is fully charged.
One of the most common trends among pod systems these days is to put the filling port on the bottom of the pod. That’s one way to hide the filling port and give the device a sleeker appearance – but when the pod’s filling port faces down, that creates a strong likelihood of leaking. The Vaporesso Xros avoids that problem by positioning the filling hole on the top of the pod. The top filling hole also means that you can fill the pod without removing it from the device. To fill the Vaporesso Xros pod, wiggle the pod’s mouthpiece until it detaches. Push the tip of your e-liquid bottle into the side hole – not the centre hole – and squeeze the bottle gently until the pod is nearly full. Replace the mouthpiece.
In the Vaporesso Xros, the pod is a self-contained unit with a permanent atomizer coil. After you’ve been using the pod for a while, you’ll begin to notice a change in flavour and a decrease in vapour production. When those things begin to affect the quality of your vaping experience in a negative way, it’s time to replace the pod. To do that, simply remove the old pod and push in a new one. Fill the new pod and give the new pod’s atomizer coil several minutes to soak up the e-liquid before you resume vaping.
You can ordinarily expect the pods for the Vaporesso Xros to last several days each. If you’re an infrequent vaper, it’s even possible to get multiple weeks of use out of each pod. If you find that your pods burn out much more quickly than that, make sure that you always wait several minutes before vaping after you’ve filled a new pod. If you don’t wait, you could burn the pod’s wick. It’s also a good idea to use an e-liquid with a minimum amount of added sweetener. Sucralose – the most popular e-liquid sweetener – leaves a coating on an atomizer coil that will shorten the coil’s life.
You can use the Vaporesso Xros by puffing on the device or by holding down the button. The automatic puff-based activation creates an experience that feels a bit more like smoking a real cigarette. You’ll get slightly bigger vapour clouds, however, if you use the button-based activation. Twist the dial on the back of the device to change its airflow characteristics.
Every new vaping device has a bit of a learning curve – and if the Vaporesso Xros is your first vaping device, you may find yourself feeling a bit overwhelmed when you use the device for the first time. You might even encounter some unexpected problems, and that’s where this section of our Vaporesso Xros instruction manual comes in. We’re former smokers ourselves, and we know how to go through the adjustment period in transitioning from smoking to vaping. Use these steps to fix the problems that you might encounter with your Vaporesso Xros.
The Vaporesso Xros is designed to receive power from a device conforming to the standard USB power specifications. In other words, the best way to charge the Xros is with your computer. Don’t attempt to charge the device with a mobile phone or tablet charger because the higher charging amperage of a “quick-charging” adapter could cause the Xros to overheat. If nothing happens when you connect the charging cable to your Vaporesso Xros, try a different cable.
The Vaporesso Xros has a power-off function that helps to prevent the device from firing accidentally when you carry it in your pocket. If nothing happens when you try to vape with the Xros, you should first try pressing the fire button five times quickly to turn the device on. If nothing happens, charge the battery. If the Vaporesso Xros still isn’t hitting, watch the LED indicator; it should blink to tell you what the problem is.
One of the best features of the Vaporesso Xros is the fact that it has a top filling hole, which reduces the possibility of leaking. It’s still possible for the pod to leak, though, and that may happen if you use too much air pressure when puffing on the device. When you puff too firmly, the air pressure forces e-liquid to enter the pod’s centre air channel, causing a gurgling sound. Once excess e-liquid enters the pod’s air channel, it’s going to exit the pod in one of two ways: by spitting into your mouth or by leaking out of the pod’s bottom air vent. To prevent your Vaporesso Xros from gurgling or leaking, you should always use light air pressure when vaping.